 how-to
How to Pass Utah Emissions With Check Engine Light On
Table of Contents
- Can You Pass a Utah Emissions Test With the Check Engine Light On?
- Why the Check Engine Light Fails an Emissions Test
- Step 1: Read the Diagnostic Trouble Code Before You Drive to the Station
- Step 2: Repair the Cause and Handle Common Emissions Faults
- Step 3: Complete the Drive Cycle and Confirm Emissions Readiness Monitors
- Utah Emissions Test Failure and Retest: What Happens Next
- When Repairs Cost Too Much: The Utah Emissions Waiver
- Conclusion: Diagnose First, Test Second
- Frequently Asked Questions
Last Updated: October 4, 2026
Can You Pass a Utah Emissions Test With the Check Engine Light On?
No. If your check engine light is on, your vehicle will fail a Utah emissions test before the inspector even checks the tailpipe.
The light is not the problem. The problem is what turned it on.
When the malfunction indicator lamp (MIL) is lit, the vehicle's on-board diagnostics (OBD-II) system has logged a diagnostic trouble code. Utah inspection stations read that code through the OBD-II port. A stored emissions-related fault means an automatic fail.
So the real question is not whether you can sneak past the test. It is how fast you can find the fault, fix it, and get the system ready to read clean.
Below, we walk through the exact steps, from pulling the code to handling the retest.
Why the Check Engine Light Fails an Emissions Test
A steady check engine light means the emissions control system has detected a fault. Utah's emissions inspection relies on OBD-II data, not just a tailpipe sniffer, so the stored code is the first thing that gets checked. If the light is on, the test ends there.
Here is what most guides get wrong: they treat the light as a nuisance to reset. It is not. It is the system telling you a component is out of spec.
A flashing check engine light is worse. It usually signals a misfire that can damage the catalytic converter. Stop driving and get it diagnosed. A steady light gives you a little more room, but not much.
Utah Division of Air Quality vehicle inspection program
How OBD-II Port Testing Reads Your Vehicle
The inspector plugs a scan tool into your OBD-II port, usually under the dashboard. The tool pulls two things: stored trouble codes and readiness monitor status. Both must be clean.
Readiness monitors are self-tests the computer runs on systems like the catalytic converter, oxygen sensor, and evaporative emissions. If a monitor has not completed, the vehicle is not ready, even with no active codes.
That is the trap. Clearing a code or disconnecting the battery wipes the monitors. The light goes off, but the car is not ready, and it still fails.
Step 1: Read the Diagnostic Trouble Code Before You Drive to the Station
Pull the code before you do anything else. A basic OBD-II scanner costs little and plugs into the same port the inspector uses. Write down the exact code, not just the description.
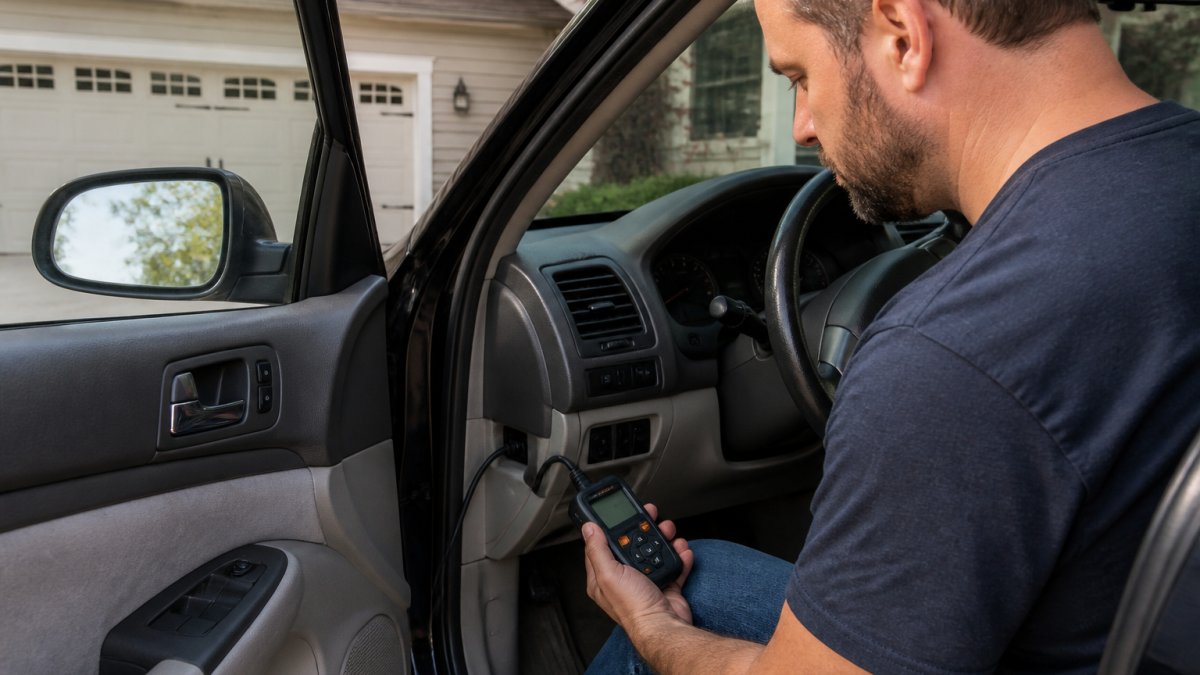
Codes starting with P0 usually point to fuel, air, or emissions faults. Common ones include:
- P0420 - catalytic converter efficiency below threshold
- P0442 - small evaporative emissions leak
- P0455 - large evaporative emissions leak
- P0130-P0167 - oxygen sensor circuit faults
- P0300-P0304 - engine misfire
Step 2: Repair the Cause and Handle Common Emissions Faults
Fix the actual cause, not the symptom. The most common emissions failures fall into two groups: leaks and sensor or converter faults. Most are cheaper to fix than owners fear.
Gas Cap, Fuel-System Leaks, and Exhaust Leaks
A loose or worn gas cap is the single most common cause of an evaporative emissions code. Tighten it until it clicks, then drive a few days. If the code clears on its own, you found it.
If not, check for:
- A cracked or missing gas cap seal
- A damaged fuel-system hose or evap line
- A rusted or leaking exhaust pipe or muffler
- A loose exhaust manifold connection
Exhaust leaks let unmetered air into the system and throw off oxygen sensor readings. A shop can find them with a smoke test in minutes.
Catalytic Converter, Oxygen Sensor, and Engine Codes
When the code points to a converter or sensor, diagnose before you replace. A P0420 often traces back to a failing oxygen sensor feeding bad data, not a dead converter. Replacing the converter first is an expensive guess.
Other frequent culprits:
- Spark plugs and air filter - worn plugs cause misfires that trigger converter codes
- Oxygen sensors - the most replaced emissions part, and often the real fix
- Knock sensor - can affect timing and emissions readings
Step 3: Complete the Drive Cycle and Confirm Emissions Readiness Monitors
After repairs, the computer needs to re-run its self-tests. This is the step most people skip, and it is why a fixed car still fails. The drive cycle is a set sequence of starts, idles, and speeds that lets each monitor complete.
A general drive cycle looks like this:
- Cold start and idle for a few minutes
- Accelerate to highway speed and hold steady
- Decelerate and coast without braking
- Idle again, then repeat the pattern
Many vehicles need several days of normal mixed driving, not one trip. Before you test, plug in your scanner and check monitor status. Every monitor should read "complete" or "ready."
EPA guidance on OBD-II readiness and emissions testing
If you disconnected the battery during repairs, you wiped every monitor. Expect to drive a full cycle or more before the system is ready.
Utah Emissions Test Failure and Retest: What Happens Next
A failed test is not the end of the road, but the clock starts ticking the moment you get the report. Here is what actually happens, in order, and where most people lose time.
What the Failure Report Tells You
When your vehicle fails, the inspector hands you a vehicle inspection report (VIR). It lists the reason for failure, usually a specific OBD-II trouble code, an incomplete readiness monitor, or a visible emissions-equipment defect. Keep this document. You will need it at the retest station, and in some cases you will need it to qualify for a waiver or a repair-cost extension.
The report also typically notes the test type performed (OBD-II scan vs. tailpipe) and the date of the test. That date matters because retest windows are tied to it.
The Retest Sequence
- Diagnose the exact cause listed on the report. Do not guess. If the report cites P0442, fix the evaporative leak, not the catalytic converter.
- Repair at a qualified shop or yourself. If you are pursuing a waiver later, repairs generally must be performed at a licensed repair facility and documented with itemized receipts.
- Complete the drive cycle. Clearing codes or disconnecting the battery resets readiness monitors. The vehicle will fail again on incomplete monitors even with no active code.
- Confirm readiness with your own scanner. Every monitor should read "complete" or "ready" before you return.
- Return for the retest within the allowed window. Most stations charge a retest fee, and many waive it if you return within a short window. Confirm the window with the station before you leave the first time.
Why Clearing the Code Before the Retest Backfires
A common mistake is to clear the code, watch the light go dark, and drive straight back to the station. The scanner will show no stored codes, but it will also show incomplete readiness monitors, which is an automatic fail in most OBD-II-based programs. You have traded one failure for another and burned your retest window.
The correct order is always: repair, drive, verify monitors, then retest.
Repair Cost Extensions and Waivers
If the required repairs exceed a set dollar threshold, state emissions programs offer a repair-cost waiver or extension that lets you register the vehicle for the current cycle without a passing test. The mechanics are consistent even when the numbers change:
- Repairs must be emissions-related and performed at a licensed facility.
- You must submit itemized receipts showing the amount spent.
- The original fault typically must still be present (you cannot fix it and also claim the waiver).
- The waiver covers one registration cycle; you start over next time.
The dollar threshold and eligibility rules are updated periodically. Confirm the current amount with the state air-quality agency or your county before you spend money assuming you will qualify.
If You Cannot Complete Repairs in Time
Some jurisdictions allow a temporary registration or extension while repairs are pending, particularly if parts are on backorder or the vehicle is not driveable. This is handled case by case. Call the agency that issued your failure report before your registration lapses. Once registration expires, the options narrow sharply.
When Repairs Cost Too Much: The Utah Emissions Waiver
If repairs exceed a set cost threshold, Utah offers an emissions waiver. You must show you spent the required amount on qualifying emissions repairs at a licensed shop, and the fault must still be present. The waiver lets you register the vehicle for that cycle.
The dollar threshold and eligibility rules change, so confirm the current amount with the Utah Division of Air Quality or your county before relying on it.
Exceptions and Alternatives for Unusual Vehicles
Not every vehicle follows the standard OBD-II path. Older vehicles may get a tailpipe test instead. Diesel, motorcycles, and certain specialty vehicles have their own rules. Some areas use different test types based on vehicle weight and fuel.
If your vehicle does not fit the standard process, call ahead.
Utah DMV vehicle registration and emissions requirements
Conclusion: Diagnose First, Test Second
The check engine light is a signal, not a setback. Read the code, fix the real fault, and confirm your readiness monitors before you test. That order is the whole game.
If you would rather skip the trip to a testing center, Mobile Emissions Pro brings certified testing to your home or office in Utah County. We handle on-the-spot registration renewal. Book online today and get your vehicle compliant without the wait.
Frequently Asked Questions
Can you have a check engine light on and still pass emissions?
A steady check engine light almost always means a failed emissions test because the OBD-II system stores a diagnostic trouble code and may show a not-ready monitor. The only exceptions are a few pre-1996 vehicles that get a tailpipe or visual inspection instead of a scan. For any 1996 or newer car, repair the fault and complete a drive cycle before you test.
Can you turn off the check engine light to pass emissions?
Clearing the code or disconnecting the battery does turn the light off temporarily, but it also wipes the readiness monitors. The inspection station will see incomplete monitor status and fail the vehicle. Hiding or disabling the light is also a bad idea legally. The reliable path is to diagnose the code, fix the cause, then let the monitors reset through normal driving.
How long should you drive after a check engine light repair before an emissions retest?
Most vehicles need a full drive cycle, which can take 30 to 60 minutes of mixed city and highway driving with a cold start, idle time, and steady speeds. Some monitors need two trips. If the light stays off and the scan tool shows all monitors ready, you can retest. If monitors are still incomplete, keep driving and rescan before you return.
Will disconnecting the battery reset emissions readiness monitors?
Yes. Disconnecting the battery clears the keep-alive memory and resets every readiness monitor to not ready. That will cause an automatic failure at an OBD-II emissions test even if the check engine light is off. If you disconnected the battery for any reason, complete a full drive cycle and confirm monitor status with a scan tool before scheduling your test.